In this chunk we will be looking at how we can use vertex functions to create 2-dimensional shapes and animate them to create a fascinating complex-looking animation made from many simple shapes. We will see how we can create lots of 2D hexagons moving in 3D space – a hexagon wave.
We saw in chunk 44 how a shape can be created using lines and vertices, so we will begin by looking at how we can create a hexagon by this method. To do this, we need to work out how to draw each line that makes up the edges of the hexagon shape. This can be done using trigonometry as shown in figure 47.1 below. Trigonometric functions are covered later, so for now you will have to trust is that this works.

Figure 47.1 The lines needed to draw a hexagon shape
The corresponding code for drawing the hexagon looks like this
// variables for the hexagon sides
float c = 200;
float a = c/2;
float b = sin(radians(60)) * c;
// draw hex shape
beginShape();
vertex(0, b);
vertex(a, 0);
vertex(a + c, 0);
vertex(2 * c, b);
vertex(a + c, 2 * b);
vertex(a + c, 2 * b);
vertex(a, 2 * b);
vertex(0, b);
endShape();
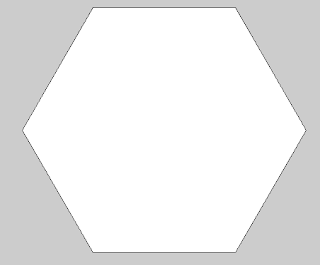
This piece of code will create a shape containing the vertices we define – a line will be drawn between each vertex creating the shape defined between beginShape() and endShape(). If you run this, you will see that a hexagon is drawn similar to that shown in figure 47.2

Figure 47.2 Hexagon shape drawn using vertices
We can make the hexagon slightly more interesting by drawing some lines from each vertex to the centre of the shape. Again, you will have to trust us on the coordinates, but the centre point of the hexagon can be found at point (2*a, b). We already know the points for each vertex as we used them above, so the additional code looks like:
// draw a line from each vertex to the centre of the hexagon
line(0, b, 2 * a, b);
line(a, 0, 2 * a, b);
line(a + c, 0, 2 * a, b);
line(2 * c, b, 2 * a, b);
line(a + c, 2 * b, 2 * a, b);
line(a + c, 2 * b, 2 * a, b);
line(a, 2 * b, 2 * a, b);
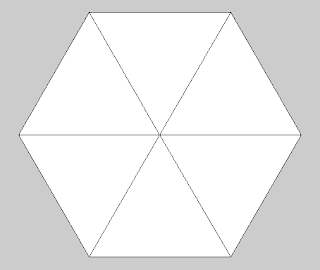
Running this along with the code for drawing the hexagon creates a shape like that shown in figure 47.3

Figure 47.3 Hexagon shape with lines to the centre
Figure 47.3 Hexagon shape with lines to the centre
Now that we have our hexagon, we can start to think about animating it. Processing has rotation functions that allow objects drawn on the screen to be rotated around the x-, y- or z-axis, for example
rotateY(0.1);
will rotate anything drawn after the rotate function by the amount given. In order to do this, either P3D or OPENGL mode needs to be enabled. We will use P3D as it doesn't rely on having an OpenGL-compatible graphics card. This is enabled by specifying it in the size() function eg
size(800, 600, P3D);
However, this will only rotate the hexagon once, where it will appear to be static. To animate a rotating hexagon, we need to use Processing's continuous mode (as seen in chunk 30) and set the background colour each time so the screen is redrawn. We also need to change the rotation each time it is drawn. This is necessary because the rotation is reset each time the draw() function is run so, to give the illusion of rotation, we need to increase the rotation each time the hexagon is drawn. The program so far looks like:
float rotation = 0.1;

void setup() {
  // 3D mode
  size(900, 500, P3D);
}

void draw() {
  background(0);
  rotateY(rotation);

  // variables for the hexagon sides
  float c = 200;
  float a = c/2;
  float b = sin(radians(60)) * c;
  // draw hex shape
  beginShape();
  vertex(0, b);
  vertex(a, 0);
  vertex(a + c, 0);
  vertex(2 * c, b);
  vertex(a + c, 2 * b);
  vertex(a + c, 2 * b);
  vertex(a, 2 * b);
  vertex(0, b);
  endShape();

  // draw a line from each vertex to the centre of the hexagon
  line(0, b, 2 * a, b);
  line(a, 0, 2 * a, b);
  line(a + c, 0, 2 * a, b);
  line(2 * c, b, 2 * a, b);
  line(a + c, 2 * b, 2 * a, b);
  line(a + c, 2 * b, 2 * a, b);
  line(a, 2 * b, 2 * a, b);

  rotation += 0.01;

}
Running this will produce a rotating hexagon animation. However, you will see that it rotates from its leftmost point, rather than rotating around the centre of the hexagon. This is because the rotation is taken from the 'origin' of the shape, in this case point (0,b) because we have drawn the shape in relation to that point. To rotate around the centre (which we already have worked out as 2 *a, b) we need to offset the vertices and lines by this point. We will do this by defining points x and y the negative of the centre point ie
 float x = -(2 * a);
 float y = -b;
Now if x and y are added to the previous vertices coordinates, the hexagon will be drawn in relation to the centre point, giving us
float rotation = 0.1;

void setup() {
  // 3D mode
  size(900, 500, P3D);
}

void draw() {
  // draw in the middle of the screen
  translate(width/2,height/2); // 1
  // reset the page with a background colour
  background(0);
  // rotate around the Y axis
  rotateY(rotation);

  // variables for the hexagon sides
  float c = 200;
  float a = c/2;
  float b = sin(radians(60)) * c;
  // define the centre variables
  float x = -(2 * a);
  float y = -b;
  // draw hex shape
  beginShape();
  vertex(x, y + b);
  vertex(x + a, y);
  vertex(x + a + c, y);
  vertex(x + (2 * c), y + b);
  vertex(x + a + c, y + (2 * b));
  vertex(x + a + c, y + (2 * b));
  vertex(x + a, y + (2 * b));
  vertex(x, y + b);
  endShape();

  // draw a line from each vertex to the centre of the hexagon
  line(x, y + b, x + (2 * a), y + b);
  line(x + a, y, x + (2 * a), y + b);
  line(x + a + c, y, x + (2 * a), y + b);
  line(x + (2 * c), y + b, x + (2 * a), y + b);
  line(x + a + c, y + (2 * b), x + (2 * a), y + b);
  line(x + a + c, y + (2 * b), x + (2 * a), y + b);
  line(x + a, y + (2 * b), x + (2 * a), y + b);
  // increase rotation
  rotation += 0.01;

}
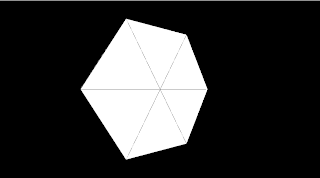
Running this will now display our hexagon rotating around its centre point – a nice little animation, although not particularly exciting. We needed to add an extra line of code here to display the hexagon properly, in the middle of the screen (labelled //1 in the code above). The translate function in Processing moves the origin of the graphics following the translate() to the position given in the function. In our case we are telling Processing to draw the hexagon and lines in the centre of the screen, shown by (width/2,height/2)

Figure 47.4 Centred rotating hexagon
To make this more exciting, we will now replicate the hexagon to produce lots of hexagons. This could be done using arrays of vertex points representing the vertices of each hexagon, but this would get complicated very quickly. Fortunately, Processing has a better way of reproducing graphics that we can use to just keep drawing the same hexagon but display many versions of it – the matrix stack.
We won't explain exactly how the matrix stack works, except to say that it rests behind the way Processing works in order to display graphics using a stack (like a stack of coins, you can only get to the top coin so have to work down the stack of coins to get to the bottom). By getting access to the matrix (using pushMatrix()), we can alter the way graphics are displayed, then put the matrix back again (using popMatrix()) for Processing to display. If we were to alter the graphics by displaying a hexagon and moving it using the translate() function, many times, we would give the appearance of lots of hexagons without needing to maintain where each one should be displayed – this can be a very powerful feature, which we will now demonstrate.
float rotation = 0.1;
// the number of hexagons
int xCount = 10;         //1

// the length of 1 hexagon side
int sideLength = 50;        //2

void setup() {
  // 3D mode
  size(900, 500, P3D);
}

void draw() {
  // reset the page with a background colour
  background(0);
  // loop the number of times specified
  for (int i = 0; i < xCount; i ++) {        //3
    // push the matrix
    pushMatrix();        //4
    // translate the hexagon to one sise
    translate((sideLength * 2) * i, height/2);          //5
    // rotate around the Y axis
    rotateY(rotation);
    // variables for the hexagon sides
    float c = sideLength;
    float a = c/2;
    float b = sin(radians(60)) * c;
    // define the centre variables
    float x = -(2 * a);
    float y = -b;
    // draw hex shape
    beginShape();
    vertex(x, y + b);
    vertex(x + a, y);
    vertex(x + a + c, y);
    vertex(x + (2 * c), y + b);
    vertex(x + a + c, y + (2 * b));
    vertex(x + a + c, y + (2 * b));
    vertex(x + a, y + (2 * b));
    vertex(x, y + b);
    endShape();

    // draw a line from each vertex to the centre of the hexagon
    line(x, y + b, x + (2 * a), y + b);
    line(x + a, y, x + (2 * a), y + b);
    line(x + a + c, y, x + (2 * a), y + b);
    line(x + (2 * c), y + b, x + (2 * a), y + b);
    line(x + a + c, y + (2 * b), x + (2 * a), y + b);
    line(x + a + c, y + (2 * b), x + (2 * a), y + b);
    line(x + a, y + (2 * b), x + (2 * a), y + b);

    popMatrix();       //6
  }

  // increase rotation
  rotation += 0.01;

}
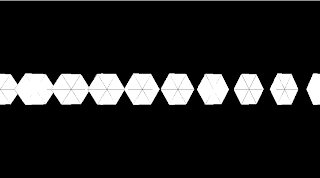
If you run the above code, you will see that we have created ten hexagons without storing where each one is being displayed at all! Each one is just a copy of the same hexagon, displayed in a different place and rotated.

Figure 47.5 Ten hexagons created using the translate() function
The changes we made to do this are very small, using just 6 lines of additional code (numbered above). In lines //1 and //2 we have created variables to control the number of hexagons and the size of each side of the hexagon. We use a for statement in line //3 to loop the number of times defined in the xCount variable, creating a hexagon each time, translating each one (line //5) by shifting each to the side. Lines //4 and //6 are the matrix methods that enable this to work. It would be easy, using this method, to fill the screen with hexagons by translating more of them using a further for statement, for example
for (int i = 0; i <= xCount; i++) {
  // translate each hexagon to the side
  translate(10 * i, 0, 0);
  // for every column of hexagons
  for (int j = 0; j <= yCount; j++) {
translate((sideLength * 2), (sideLength * 2), 0);

No comments:
Post a Comment